By: Jaguar 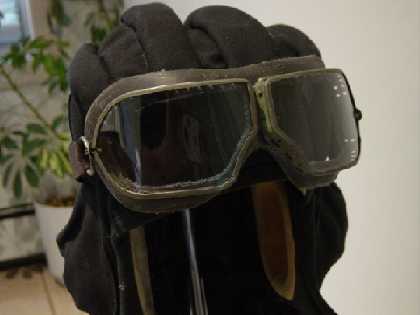
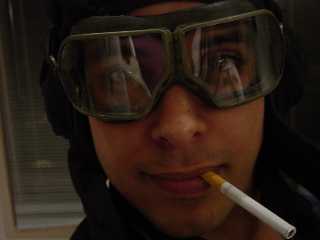
Lets face it: goggles suck. They fog up, get in your way, and lessen the believability of your impression -- in the real world, most soldiers don't need to wear them all the time. To get maximum protection, we have to, and our choices of goggles are limited to those that can provide protection from bb's.
While this isn't much of a problem for airsofters doing a modern soldier impression because they can use ballistic sunglasses, players who want a more traditional look dont have it easy. They usually settle for something unobtrusive and try to pretend they're not there and hope everyone else will, too.
People after an eastern-bloc impression have even less selection, especially if impersonating soviet-era troops.
Fortunately, there is a very easy solution: russian army dust goggles, modified to be safe enough for airsoft.
WHAT YOU NEED:
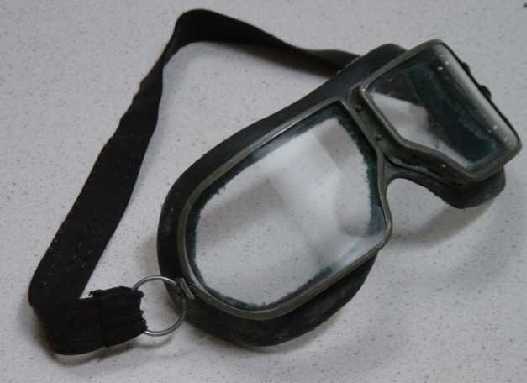
- GOGGLES: These can be hard to find, especially for a reasonable price. I got mine at lenin's legacy for the very reasonable price of $14.00. They are standard red army issue dust goggles (dated 1989), used by paratroopers, motor and armour corps. They are comfortable, and have a lot of ventilation holes to help reduce fogging. The lenses are unfortunately glass, but we'll fix that soon enough!
-
FACE SHIELD: Like shop glasses for your entire face, these helmets use ANSI Z87-grade plastic to protect the wearer, the same material used in most safety glasses and goggles. Rather than buying an entire helmet, just by the replacement window. These will cost you about $3-$5 at most hardware stores. If you are having trouble finding one, www.safteyglassesusa.com has them for $2.99, shipping extra. Whatever you get, just make sure it says that it is ANSI certified. This stuff will easily stop a 400 fps BB shot from 3inches away, with barely a scratch. Make sure it is .040 in thickness to be sure it will fit your goggles.

- HEAVY DUTY SHEARS: Find them at your hardware store.
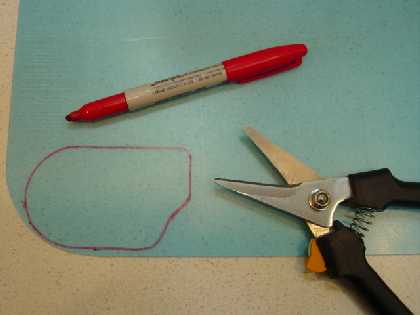
- MARKER: To trace the shape of the lense on the plastic. I used a sharpie.
INSTRUCTIONS:
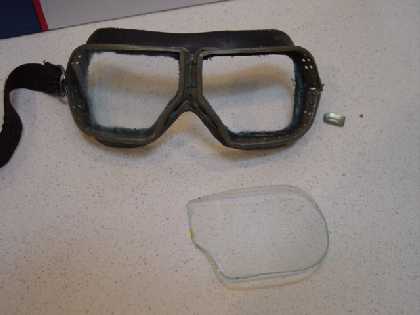
STEP 1: Take out the lenses. This is done (at least on mine) by detaching the little keychain-like rings on the strap from the loops on the side of the metal frame. Be careful not to lose the little tabs that hold the loops together and the lens in place.
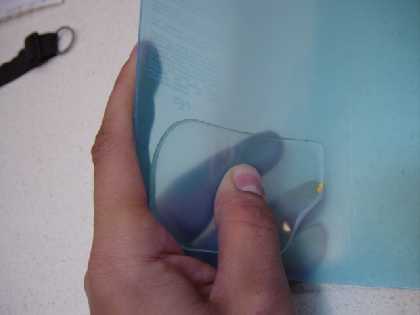
STEP 2: Hold the glass lense, curved face down, against the plastic. Use your thumb to hold it in place and fingers to bend it until it is pressed against the entire surface of the lense. Then, just trace around the glass with the marker.
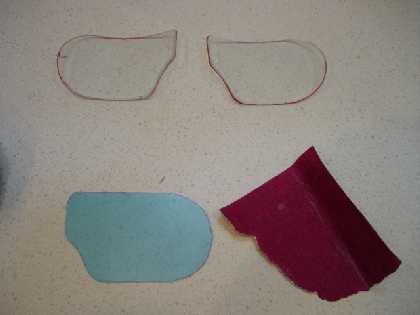
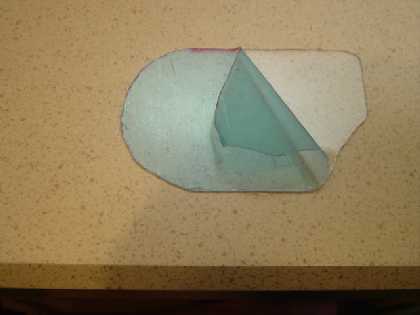
STEP 3: Cut the lense out, and install it in the goggles. If itdoesnt totally fit, keep comparing it to the glass lense, and trimming as necessary. You can use sandpaper for finer work. Repeat with the other lense, and remove the protective tape from your new lenses.
STEP 4 (optional): Put some shaving cream on the lenses. Leave it there for 10 minutes, and then wipe it off. This will prevent fogging.
You're done! Now go find some bb's to stop with your face.